Aplicación Web 2.0 Openmeetings.
Instalar Openmeetings en Ubuntu 10.04 LTS
Lo primero que haremos es descargar el programa:
wget http://openmeetings.googlecode.com/files/openmeetings_1_5_rc1_r3393.zip
Lo siguiente para evitar unos problemas a la hora de instalar paquetes actualizamos las librerías y instalamos las actualizaciones.
#apt-get update
#apt-get upgrade
Miramos si tenemos los siguientes programas y si no los instalamos nos irán haciendo falta según vallamos avanzando
#apt-get install imagemagick
#apt-get install gs-gpl
#apt-get install zip
#apt-get install unzip
#apt-get install bzip2
#apt-get install subversion
#apt-get install git-core
#apt-get install checkinstall
#apt-get install yasm
#apt-get install texi2html
#apt-get install sox
#apt-get install flvtool2
#apt-get install lame
#apt-get install swftools
#apt-get install gedit
Lo siguiente es instalar el java:
#apt-get install java-package
#apt-get install sun-java6-bin
#apt-get install sun-java6-jdk
#apt-get install java-package
#apt-get install sun-java6-jre
#apt-get install ant
Otro que necesitaremos pero en este caso le tenemos instalado ya es el :
#apt-get install mysql-server
También instalamos el Openoffice son los siguientes paquetes:
#apt-get install openoffice.org-write
#apt-get install openoffice.org-calc
#apt-get install openoffice.org-impress
#apt-get install openoffice.org-draw
#apt-get install openoffice.org-math
Una vez instalado el Openoffice pasamos a instalar las siguientes librerías:
#apt-get install libart-2.0-2
#apt-get install libt1-5
#apt-get install libfaac-dev
#apt-get install libfaad-dev
#apt-get install libmp3lame-dev
#apt-get install libsdl1.2-dev
#apt-get install libx11-dev
#apt-get install libxfixes-dev
#apt-get install libxvidcore-dev
#apt-get install zlib1g-dev
#apt-get install libogg-dev
#apt-get install libvorbis0a
#apt-get install libvorbis-dev
#apt-get install libgsm1
#apt-get install libgsm1-dev
#apt-get install libfaad2
#apt-get libavformat-dev
#apt-get libavcodec-dev
#apt-get libavfilter-dev
#apt-get libswscale-dev
Una vez todos los paquetes instalados pasamos a instalar los de la configuración de swftools:
# wget http://www.swftools.org/swftools-0.9.2.tar.gz
Descomprimimos el paquete y arrancamos el configure:
# tar -zvxf swftools-0.9.2.tar
# cd swftools-0.9.2
# ./configure
# make
# make install
Si tienes problemas con el ./configure y make Visita el siguiente tutorial.
Una vez terminado pasamos a la Descarga e instalación ffmpeg
Lo hacemos con el siguiente comando:
# apt-get install ffmpeg
Instalamos el codec de h264
# apt-get install x264 libx264-dev
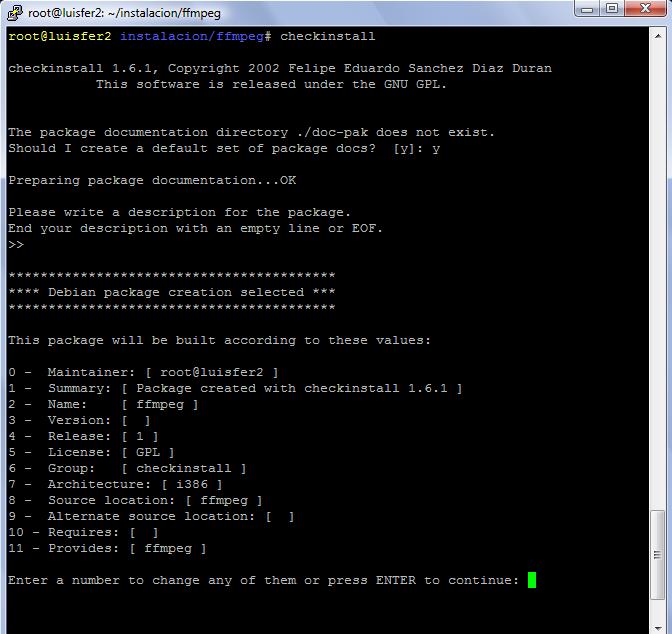
Y ponemos checkinstall. Si no lo tenemos instalamos el comando checkinstall. y seguimos los pasos como se muestra en la imagen.
#apt-get install checkinstall
Descomprimir y configurar el directorio de Openmeetings
Descomprimiremos Openmeetings y lo moveremos al directorio /opt .
# unzip  openmeetings_1_5_rc1_r3393.zip
# mv red5 /opt/
Ahora vamos a configurar los permisos de los directorios y ficheros.
# chown -R nobody\: /opt/red5     (Configuramos el usuario nobody como propietario)
# chmod +x /opt/red5/*.sh         (Nos aseguramos de que tenga permiso de ejecucion)
# chmod +x /opt/red5/webapps/openmeetings/jod/*.sh
Configurar servicios de Openmeetings
Creamos el fichero /etc/init.d/red5 y /etc/init.d/openoffice y los editamos pegando estos códigos Si no hemos copiado openmeetings en /opt tendremos que modificar el fichero red5 en RED5_HOME=/opt/red5
Red5
# touch /etc/init.d/red5
# nano /etc/init.d/red5
Insertamos el siguiente código:
#! /bin/sh
#
# red5 red5 initscript
#
# Author: Luisfer.
#
set -e
PATH=/usr/local/sbin:/usr/local/bin:/sbin:/bin:/usr/sbin:/usr/bin
DESC="Red5 flash streaming server"
NAME=red5
RED5_HOME=/opt/red5
DAEMON=$RED5_HOME/$NAME.sh
PIDFILE=/var/run/$NAME.pid
SCRIPTNAME=/etc/init.d/$NAME
# Gracefully exit if the package has been removed.
test -x $DAEMON || exit 0
# Read config file if it is present.
if [ -r /etc/default/$NAME ]
then
	. /etc/default/$NAME
fi
#
# Function that starts the daemon/service.
#
d_start() {
	start-stop-daemon --start -c nobody --pidfile $PIDFILE --chdir $RED5_HOME --background --make-pidfile --exec $DAEMON
}
#
# Function that stops the daemon/service.
#
d_stop() {
	start-stop-daemon --stop --quiet --pidfile $PIDFILE --name java
	rm -f $PIDFILE
}
case "$1" in
	start)
    echo -n "Starting $DESC: $NAME"
    d_start
    echo "."
	;;
	stop)
    echo -n "Stopping $DESC: $NAME"
    	d_stop
    echo "."
	;;
	restart|force-reload)
    echo -n "Restarting $DESC: $NAME"
    d_stop
    sleep 1
    d_start
    echo "."
	;;
	*)
    echo "Usage: $SCRIPTNAME {start|stop|restart|force-reload}" >&2
    exit 1
	;;
esac
exit 0
exit 0
Vamos a dar permisos de ejecución.
# chmod +x /etc/init.d/red5
Y por ultimo si queremos tener el servidor red5 como servicio ejecutaremos este comando.
# update-rc.d red5 defaults
Openoffice
# touch /etc/init.d/openoffice
# nano /etc/init.d/openoffice
Insertamos el siguiente código:
#!/bin/bash
# openoffice.org headless server script
#
# chkconfig: 2345 80 30
# description: headless openoffice server script
# processname: openoffice
#
# Author: Vic Vijayakumar
# Modified by Luisfer
#
OOo_HOME=/usr/bin
SOFFICE_PATH=$OOo_HOME/soffice
PIDFILE=/var/run/openoffice-server.pid
set -e
	case "$1" in
	start)
	if [ -f $PIDFILE ]; then
    	echo "OpenOffice headless server has already started."
    	sleep 5
    	exit
	fi
	echo "Starting OpenOffice headless server"
	$SOFFICE_PATH -headless -nologo -nofirststartwizard -accept="socket,host=127.0.0.1,port=8100;urp" & > /dev/null 2>&1
	touch $PIDFILE
	;;
	stop)
	if [ -f $PIDFILE ]; then
    	echo "Stopping OpenOffice headless server."
    	killall -9 soffice && killall -9 soffice.bin
    	rm -f $PIDFILE
    	exit
	fi
	echo "Openoffice headless server is not running."
	exit
	;;
	*)
	echo "Usage: $0 {start|stop}"
	exit 1
esac
exit 0
Vamos a dar permisos de ejecución.
# chmod +x /etc/init.d/openoffice
Y por ultimo si queremos tener el servidor openoffice como servicio ejecutaremos este comando.
# update-rc.d openoffice defaults
Crear y configurar la base de datos
Ahora tendremos que crear la base de datos en este caso utilizaremos MySQL.
# echo "CREATE USER openmeetings@localhost;" | mysql -u root -p (Creamos el usuario)
# echo "CREATE DATABASE openmeetings DEFAULT CHARACTER SET 'utf8';" | mysql -u root -p (Creamos la base de datos)
# echo "GRANT ALL PRIVILEGES ON openmeetings.* TO 'openmeetings'@'localhost' IDENTIFIED BY 'openmeeting' WITH GRANT OPTION;" | mysql -u root -p (Asignamos permisos y una contraseña)
# echo "FLUSH PRIVILEGES;" | mysql -u root -p (Refrescamos los permisos)
Vamos a configurar el fichero de conexión.
$ sudo gedit /opt/red5/webapps/openmeetings/conf/hibernate.cfg.xml
En las lineas 12 y 13 editaremos el usuario y contraseña de conexión.
<!– User / Password –>
<property name="connection.username">root</property>
<property name="connection.password">admin</property>
Un poco más abajo encontraremos la de selección de la base de datos.
<!– for performance reasons changed to MyISAM from org.hibernate.dialect.MySQLInnoDBDialect –>
<property name="dialect">org.hibernate.dialect.MySQLMyISAMDialect</property>
<property name="connection.url">jdbc:mysql://localhost/openmeetings …</property>
Iniciar servidores de Openmeetings
Vamos a inciar red5 y openoffice
# /etc/init.d/red5 start
# /etc/init.d/openoffice start
Instalar Openmeetings
Entramos en nuestro navegador y escribimos en mi caso http://192.168.1.230:5080/openmeetings/install
alumnos……:23050801
…En próximos episodios jiji [no he sido capaz de seguir más de aqui por lo siguiente me decidido instalar el bigbluebutton]